Brewing Guide
- French Press
- Chemex
- Kalita Wave
- Cold Brew
- Home Drip
- AeroPress
- V60 Pour Over
- Clever Dripper
- Next Level Pulsar
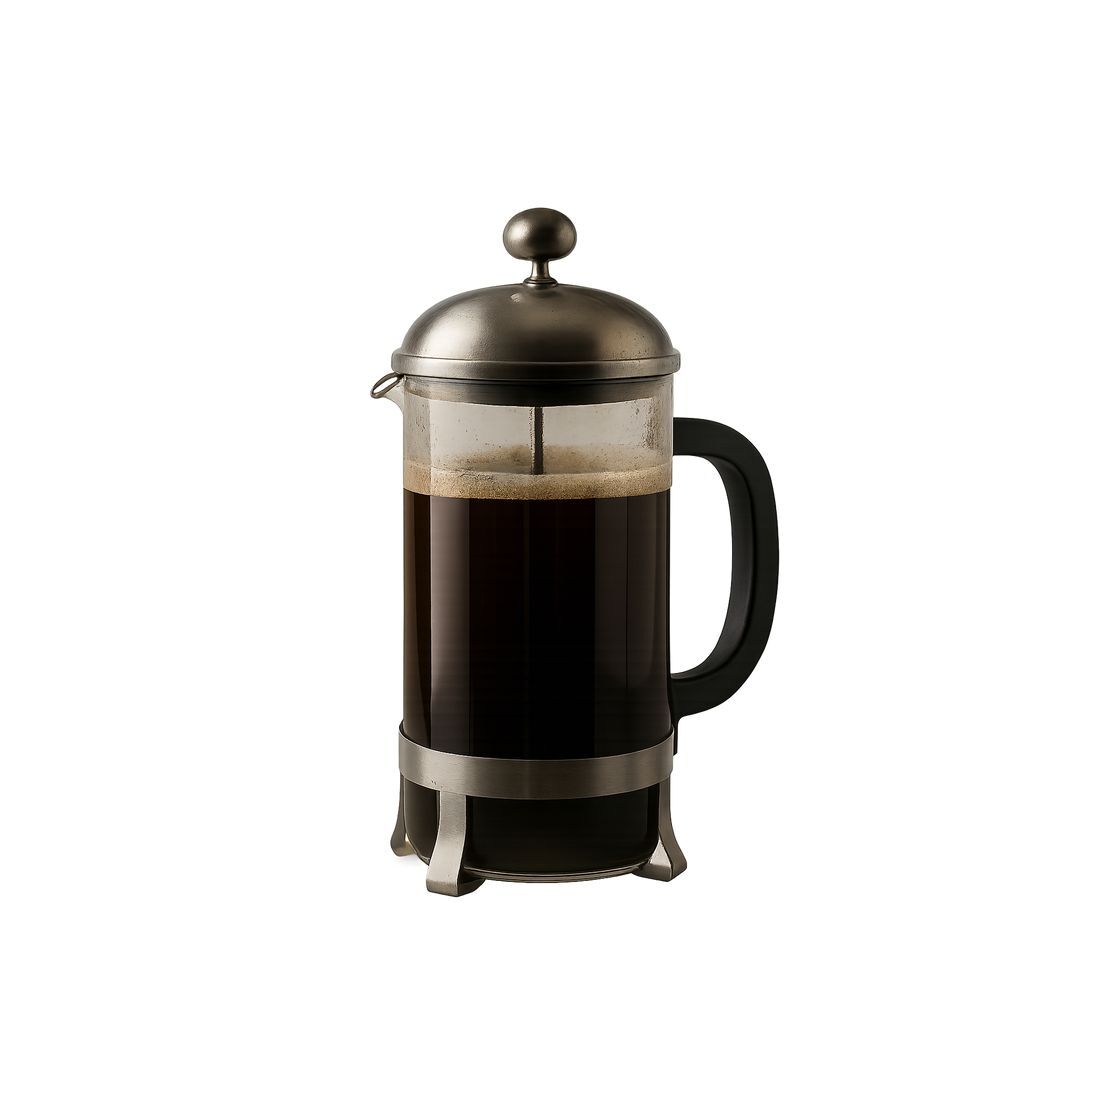
French Press Brewing Guide
The French Press has remained largely unchanged since its invention by Ugo Paolini and patent by Italian designers Attilio Calimani and Giulio Moneta in 1929. It remains one of the simplest and most effective ways to brew multiple cups of coffee in just 4 minutes.
Brew Characteristics: Full body, rich flavor, long aftertaste
What You’ll Need:
- 8-cup French Press
- Burr grinder (coarse grind, like breadcrumbs)
- Hot water kettle (temperature controlled is ideal)
- 49 grams (about 7 tbsp) of freshly roasted coffee
- 735 grams of hot water (200–205°F)
- Use a 1:15 coffee-to-water ratio if scaling
- Spoon
- Timer
- Scale
Step-by-Step Instructions
Step 1: Preheat the French Press
Fill your French Press with hot water and let it sit for 1 minute. This helps stabilize the brewing temperature and keeps your coffee warm. Then discard the water.
Step 2: Add the Coffee
Place the ground coffee into the bottom of the empty, preheated French Press.
Step 3: Begin Brewing
Start your timer for 4 minutes. Pour all the hot water evenly over the coffee grounds, ensuring all grounds are saturated. Use a spoon to gently press any floating grounds below the surface if needed.
Step 4: Cover & Steep
Place the lid on the French Press and gently press the plunger just until the coffee is submerged. Let it steep for the remainder of the 4-minute timer.
Step 5: Finish & Serve
When time is up, remove the lid and skim off the top layer of floating grounds with a spoon. Replace
the lid and press the plunger down slowly and evenly.
Pour the brewed coffee into a carafe or
directly into cups to prevent over-extraction.
Cleaning Tip:
After brewing, add a little water to the used grounds, swirl gently, and dump the contents into the trash—never down the sink.
Now you’re ready to enjoy your freshly brewed French Press coffee. Cheers! ☕
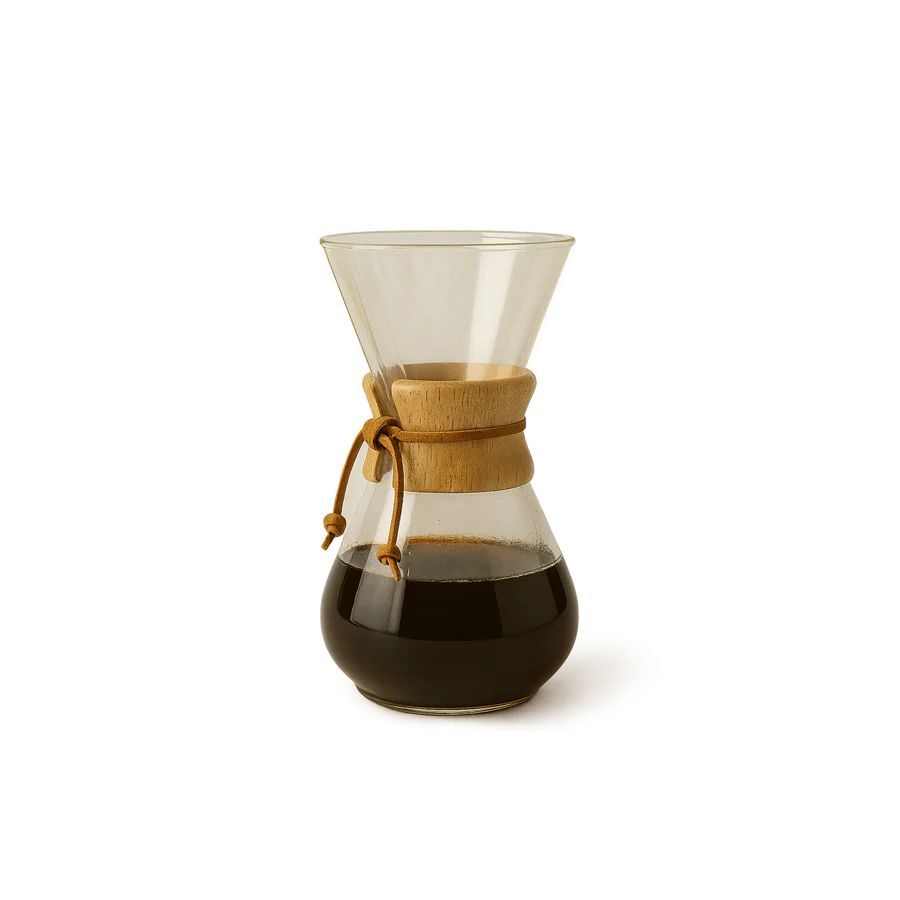
Chemex Brewing Guide
The Chemex was invented in 1941 by German chemist Peter J. Schlumbohm. Known for its elegant, functional design, the Chemex is included in the permanent collection of the Museum of Modern Art in New York City. It offers a brewing experience that’s as beautiful as it is effective.
Brew Characteristics: Light-medium body, clean cup, clarity of flavors
What You’ll Need:
- 6-cup Chemex brewer
- Chemex paper filters
- Burr grinder (medium-coarse grind, like coarse sea salt)
- Pour-over kettle
- 40 grams of freshly roasted coffee
- 640 grams of hot water (195-205°F)
- Use a 1:16 coffee-to-water ratio if scaling
- Spoon
- Timer
- Scale
Step-by-Step Instructions
Step 1: Prep Chemex
Place the paper filter into the Chemex with the three-layered side facing the spout. Preheat both the Chemex and the filter by pouring hot water through them. Let the water sit for about 30 seconds to warm the glass, then discard the water. This step also helps reduce any papery taste.
Step 2: Add the Coffee
Weigh out 40 grams of coffee and grind to a medium-coarse consistency. Place the Chemex with a filter on the scale and zero the scale. Add the ground coffee, give it a gentle shake to level the bed, then zero the scale again. Heat your water to the desired temperature.
Step 3: Begin Brewing
Start your timer and pour approximately 80 grams of water over the grounds, ensuring all are evenly saturated. Let it sit until the timer reaches 45 seconds—this stage is called the bloom, where gas escapes from the coffee.
At 0:45, pour 140 grams of water slowly in small circular motions, avoiding the filter edges. Use a spoon to give a few gentle stirs.
Continue adding water as follows:
- At 1:30, pour another 140 grams
- At 2:30, add 140 grams more
- At 3:30, finish with the final 140 grams, reaching a total of 640 grams
Once the water drains about halfway, gently swirl the Chemex to flatten the coffee bed. Allow the brew to come to a slow drip; this should take 5–6 minutes total.
Step 4: Finish Serve
Remove the filter with the spent grounds. Give the Chemex a gentle swirl, then pour the freshly brewed coffee into your favorite mug. Enjoy!
Kalita Wave Brewing Guide
Originating from Japan, the Kalita Wave is a popular pour-over brewer known for its flat-bottom filter, which promotes an even extraction. Its sleek stainless steel design paired with a glass server makes it a favorite for home brewers and coffee enthusiasts alike.
Brew Characteristics: Light-medium body, clean cup, clarity of flavors
What You’ll Need:
- Kalita Wave 185 brewer
- Glass server or mug
- Kalita Wave 185 paper filter
- Burr grinder (medium-fine grind, like table salt)
- Pour-over kettle
- 25g of freshly roasted coffee
- 400g of 195-205°F hot water
- Use a 1:16 coffee-to-water ratio if scaling
- Timer
- Scale
Step-by-Step Instructions
Step 1: Prep & Preheat
Place the filter in the Kalita Wave and rinse it with hot water. This preheats the brewer and helps eliminate any paper flavor. While you're at it, you can warm your mug too. Discard the rinse water, keeping the filter in place.
Step 2: Add Coffee
Grind 25g of coffee to a medium-fine consistency. Add the grounds to the filter and gently shake to level the bed. Place the Kalita Wave on your carafe or mug. You’re ready to brew.
Step 3: Begin Brewing
Start your timer and pour roughly 50 grams of hot water over the grounds, ensuring all are evenly saturated. The coffee will begin to bubble—this is called the bloom, where gases escape from the coffee.
Step 4: Spiral Pours
At 0:30, begin your pour in slow spirals starting in the center and working your way to the edge. The spiral pour helps with even extraction by agitating all the grounds.
From 0:30 to 2:00, continue pouring in 50g increments every 15 seconds until you reach 400g total. Let the water draw down completely before removing the Kalita Wave.
Total brew time should fall between 3:00-3:30 minutes and will yield approximately 12 oz of coffee.
Step 6: Finish & Serve
Give the brewed coffee a gentle swirl, then pour it into your favorite mug. Enjoy the clean, flavorful results of your pour-over!
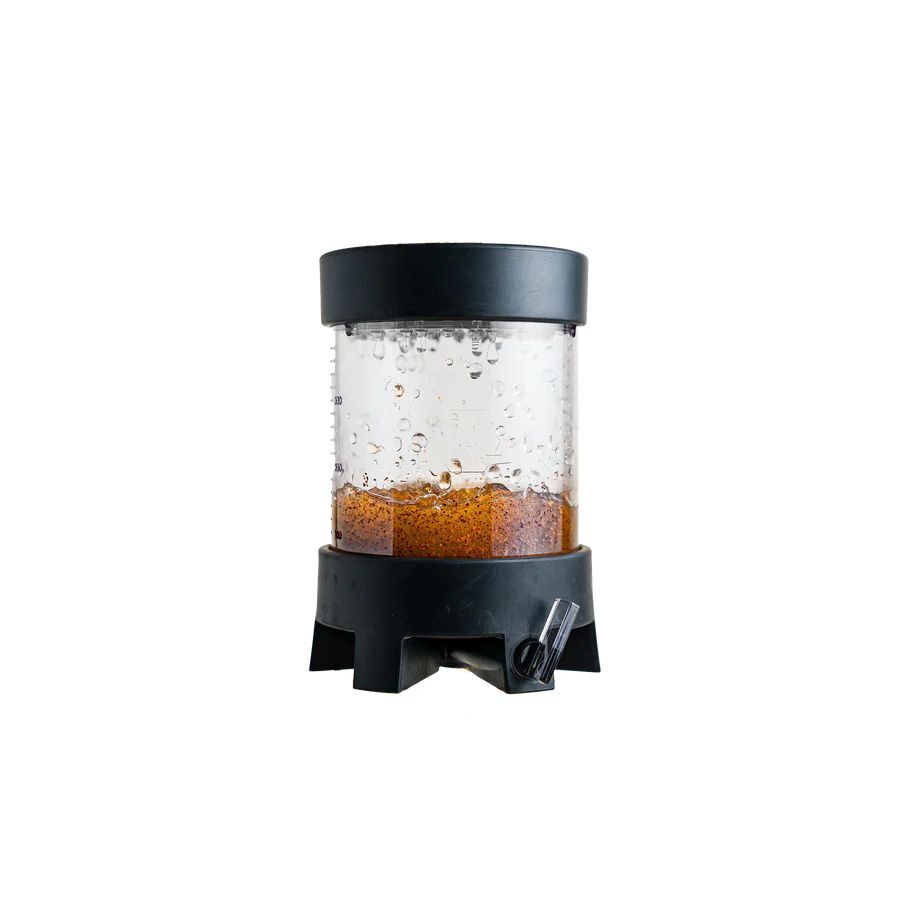
Cold Brew Guide – Toddy Home Cold Brew Maker
Toddy has been a trusted name in cold brew since 1964. Their home cold brew system is simple, effective, and perfect for producing a rich, smooth concentrate that can last you all week.
Cold brew is exactly what it sounds like—coffee brewed with cold water over a long period of time. Because there's no heat involved, the extraction process is slower, typically taking 12 to 24 hours. The result is a concentrated coffee that can be diluted to your preferred strength and flavor.
Brew Characteristics: Smooth, sweet, with low acidity and bitterness
What You’ll Need:
- 12 oz. bag of 8th & Roast Cold Brew Blend
- Burr grinder (coarse grind, like breadcrumbs)
- Toddy Home Cold Brew System
- Filtered water (7 cups/56 oz. total)
- Scale
Step-by-Step Instructions
Step 1: Prep Toddy
Insert the rubber stopper into the bottom of the brewing container. Rinse the felt filter with water and place it inside the container.
Step 2: Pre-Wet
Pour 1 cup (8 oz.) of water into the bottom of the container to ensure the coffee grounds at the base will be fully saturated.
Step 3: Add Coffee & Water (Layered)
- Add half the bag of ground coffee (6 oz. / 170g) into the container.
- Slowly pour in 3 cups (24 oz.) of water, making sure to evenly wet all the grounds.
- Add the remaining half of the coffee.
- Pour 3 more cups of water over the top. If any grounds are dry, gently press them into the water with a spoon—don’t stir.
Step 4: Steep
Cover the top of the container and let it steep for 18-24 hours at room temperature.
Step 5: Drain
After it’s steeped, position the brewing container over the glass decanter. Remove the rubber stopper and allow the concentrate to drip out fully.
The resulting concentrate will stay fresh for up to 2 weeks in the refrigerator.
Step 6: Finish & Serve
To serve, dilute 1 part cold brew concentrate to 2-3 parts water (or to taste), pour over ice, and enjoy! You can adjust the ratio depending on your preferred strength.
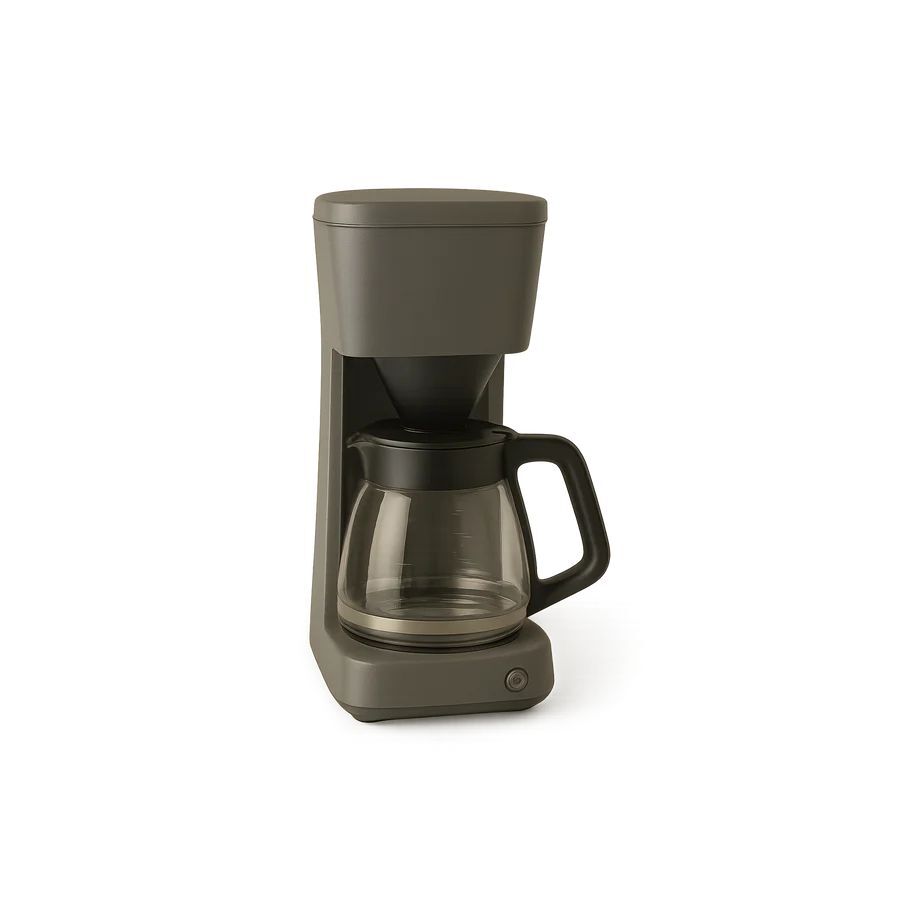
Home Drip Brewing Guide
This is the most common brewing method found in households around the world. While coffee machines vary in design, the Specialty Coffee Association maintains a list of certified home brewers that meet ideal standards for temperature and brew time—perfect for getting the most out of your 8th & Roast coffee.
Brew Characteristics: Clear, light body, consistent flavor.
What You’ll Need:
- Home coffee brewer (recommended SCA Certified brewer)
- Coffee filter
- Filtered water
- Burr grinder (medium-coarse grind, like coarse sea salt, or pre-ground coffee for auto drip)
- Scale (or tablespoon scoop)
Step-by-Step Instructions
Step 1: Prep the Filter
Place a paper filter in your brewer’s basket and rinse it with hot water. This helps remove any papery taste and preheats the brew basket. Discard the rinse water.
Step 2: Add Coffee
Use a 1:16 ratio of coffee to water (approximately 8 grams per 5 oz of water). stopper and allow the concentrate to drip out fully.
Example: For a Moccamaster 10- cup brewer (50 oz.), use 80 grams of coffee for a full pot.
If you don’t have a scale, use 1 heaping tablespoon per 5 oz. cup. Add the ground coffee to the filter
and gently shake to level the coffee bed.
Step 3: Begin Brewing
Start the brew cycle. Total brew time should be between 4-6 minutes.
If your machine finishes too quickly,
look for a pulse or slow brew setting to extend the extraction time.
Step 4: Finish & Serve
Once brewing is complete, remove and discard the filter to prevent dripping.
Pour your fresh coffee into
your favorite mug and enjoy!
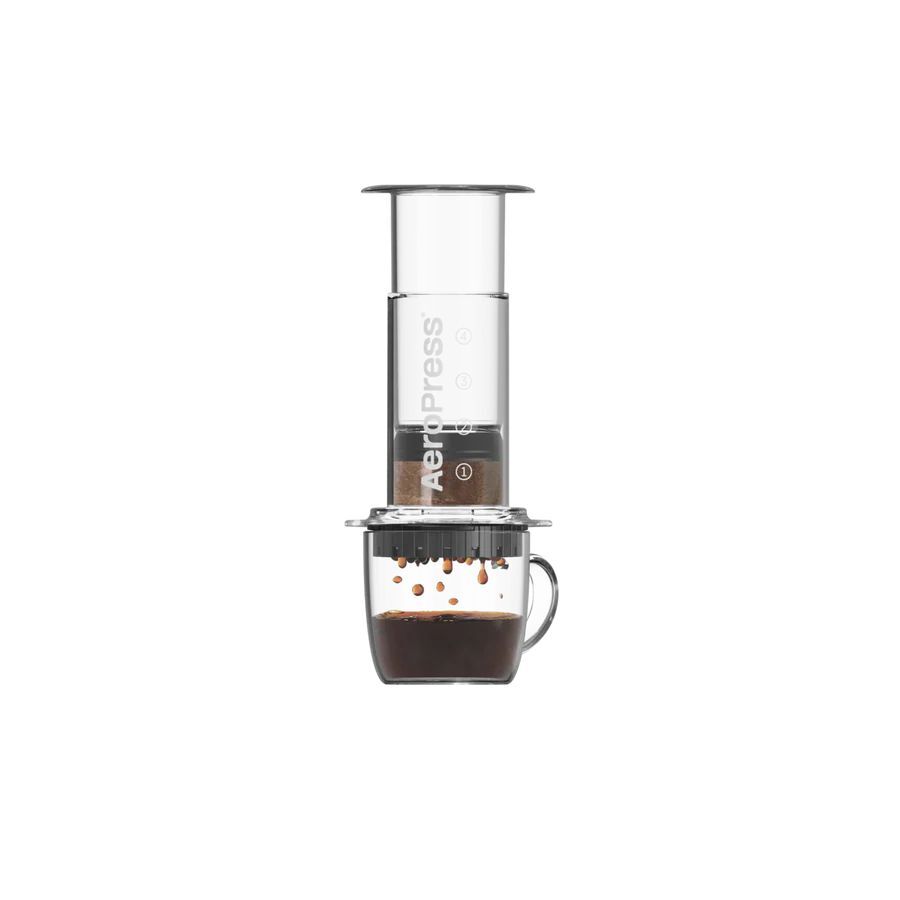
AeroPress Brewing Guide
Invented in 2005 by Alan Adler, the AeroPress is a versatile, compact brewer that’s perfect for single cups with
a clean and nuanced flavor. It’s popular among travelers and home brewers alike for its quick brew time and easy
cleanup.
Brew characteristics: Medium body, bright acidity, low bitterness.
What You’ll Need:
- AeroPress brewer (with plunger, chamber, and filter cap)
- Glass server or mug
- AeroPress paper filter
- Burr grinder (medium-fine grind; like table salt)
- 17 grams freshly roasted coffee
- 255 grams of 195-205°F hot water
- Stirrer (or spoon)
- Timer
- Scale
Step-by-step Instructions (inverted method):
Step 1: Prep AeroPress
Place the plunger inside the chamber about 1 cm and stand the AeroPress upside down (plunger side down). Place on a scale and zero it out.
Step 2: Add Coffee
Add 17 grams of medium-fine ground coffee into the chamber. Zero the scale again.
Step 3: Begin Brewing
Start the timer. Pour 255 grams of hot water into the chamber within 15 seconds.
Step 4: Agitate
Stir the slurry gently for 10 seconds. Then, place the filter inside the cap and rinse it with hot water.
Step 5: Press
At 1:00 minute, carefully place the filter cap on the AeroPress and flip the entire device over your mug or server. Press down slowly and steadily. You should finish pressing around 1:45–2:00 minutes.
Step 7: Finish & Serve
Remove the cap and push out the puck. Rinse and clean for next time.
Enjoy your smooth and balanced AeroPress brew!

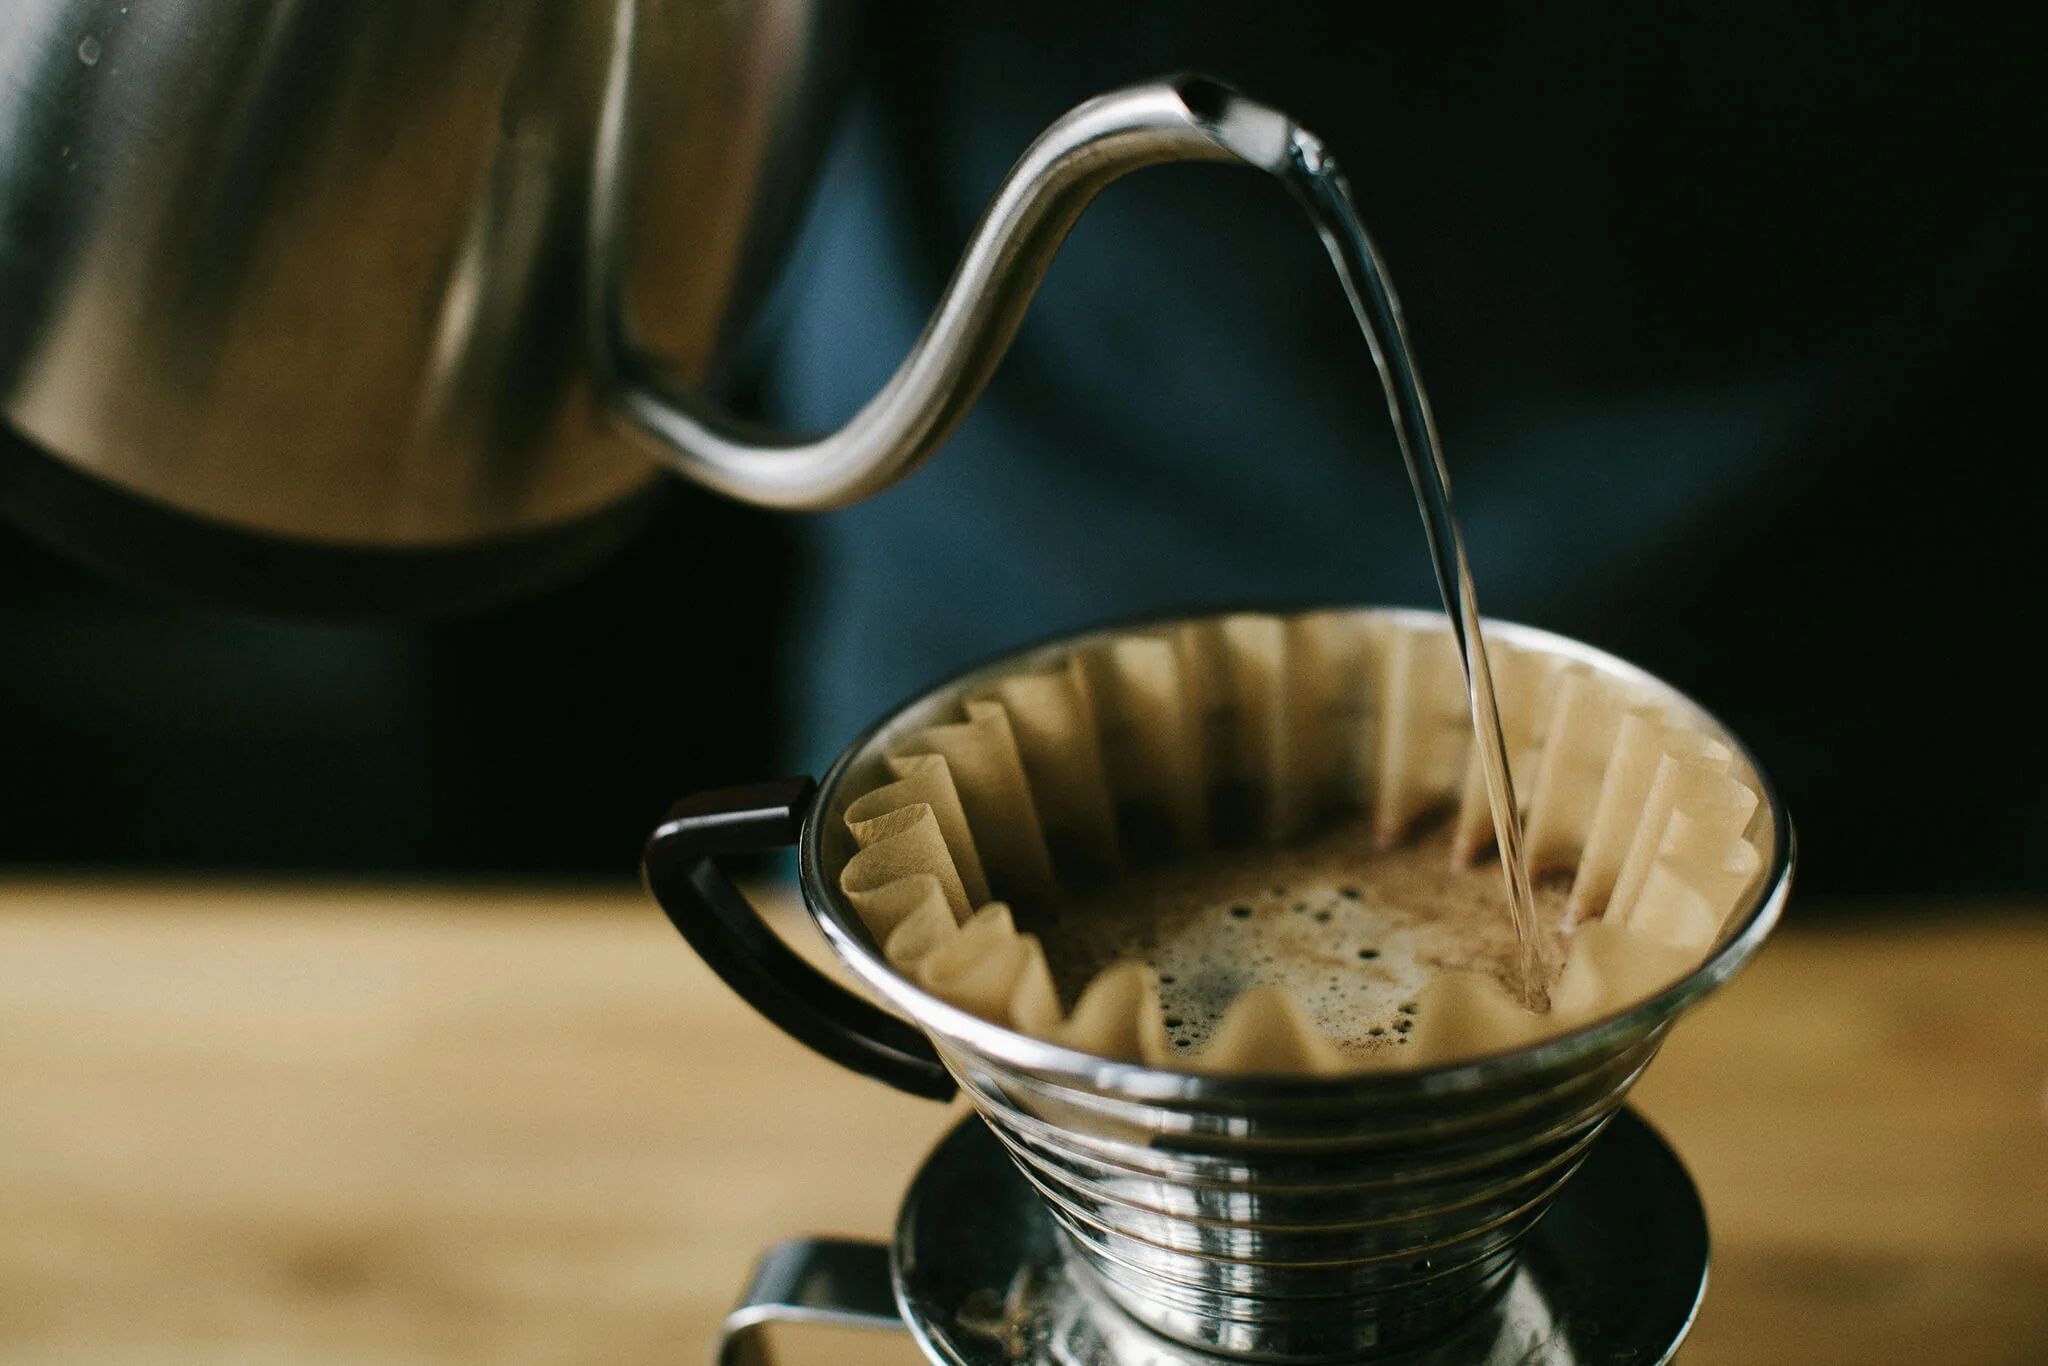
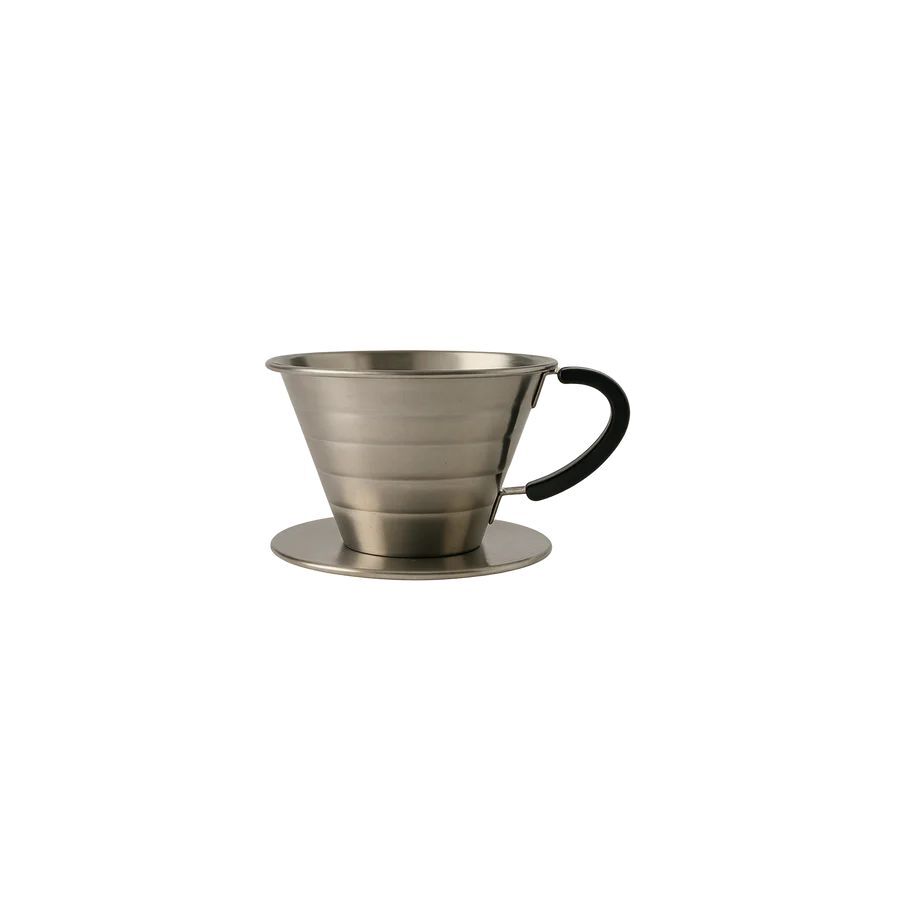
V60 Pour Over Brewing Guide
Developed by Hario in Japan, the V60 is known for its spiral ribs and cone shape, which allow for full control of flow rate and brew time. It produces a delicate and nuanced cup that highlights origin flavors.
Brew characteristics: Light body, high clarity, and pronounced acidity
What You’ll Need:
- Hario V60 dripper
- Glass server or mug
- V60 paper filter
- Burr grinder (medium-fine grind; like table salt)
- Pour over kettle
- 20 grams freshly roasted coffee
- 320 grams of 195-205°F hot water
- Use a 1:16 coffee-to-water ratio if scaling
- Timer
- Scale
Step-by-Step Instructions:
Step 1: Prep V60
Place the filter in the V60 and rinse thoroughly with hot water. This removes paper flavor and preheats the vessel. Discard the rinse water.
Step 2: Add Coffee
Add 20 grams of coffee and level the bed. Place the V60 and vessel on a scale and zero it out.
Step 3: Begin Brewing
Start your timer and pour roughly 40 grams of hot water over the grounds, ensuring all are evenly saturated. The coffee will begin to bubble—this is called the bloom, where gases escape from the coffee.
Step 4: Spiral Pours
At 0:30, begin your pour in slow spirals starting in the center and working your way to the edge. The spiral pour helps with even extraction by agitating all the grounds.
From 0:30 to 2:00, continue pouring in 40g increments every 15 seconds, and then at 2:00 pour the last 30 grams until you reach 320 grams total.. Let the water draw down completely before removing the Kalita Wave.
Total brew time should fall between 3:00-3:30 minutes and will yield approximately 10 oz of coffee.
Step 5: Finish & Serve
Once the water fully drains (by around 3:30), remove the dripper, swirl the coffee, and serve.
Enjoy a clean, crisp, and flavorful V60 brew.
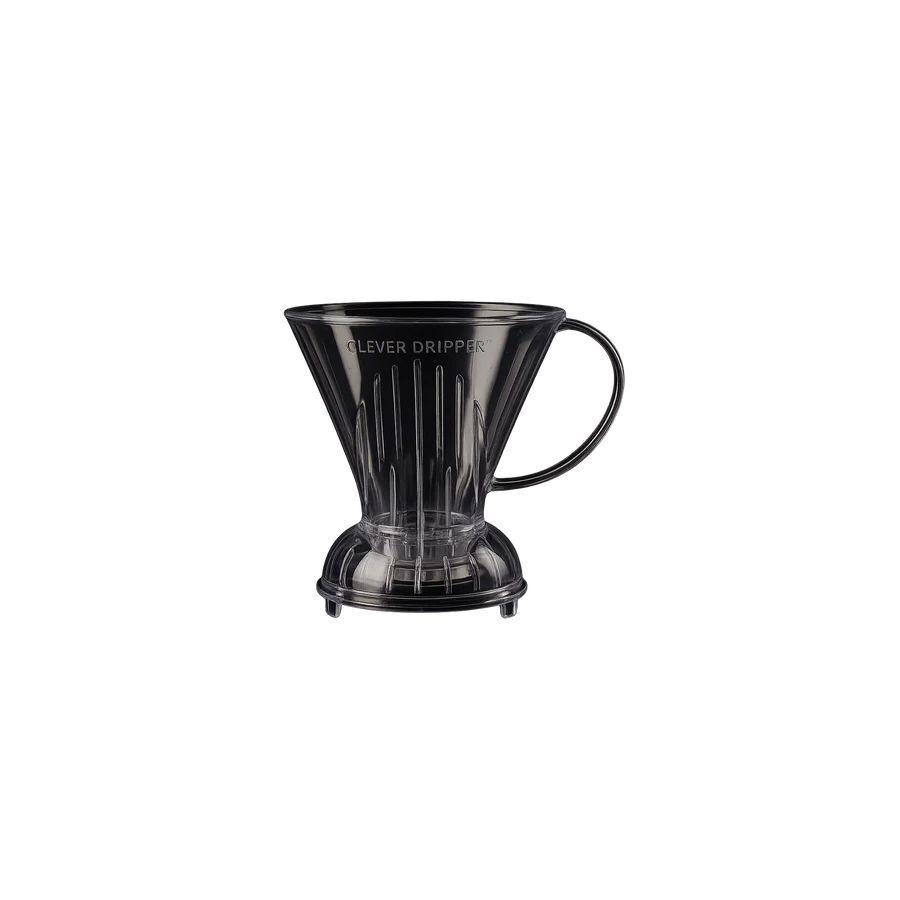
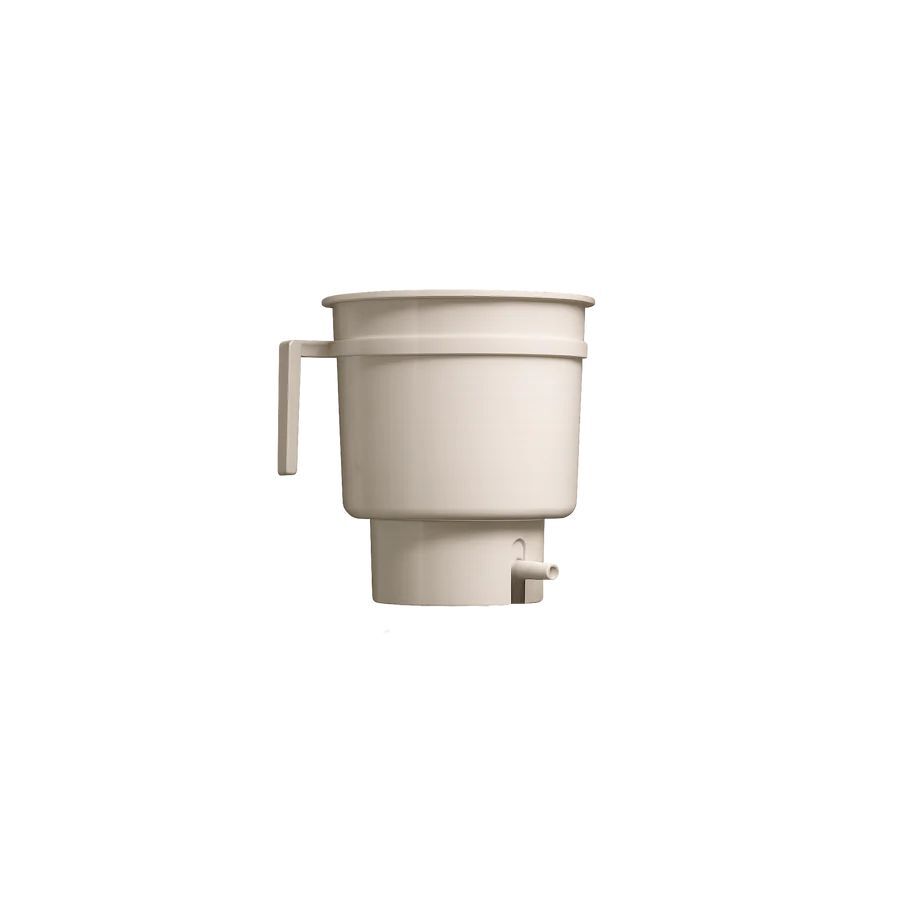
Clever Dripper Brewing Guide
The Clever Dripper combines full immersion brewing with the clarity of a pour over. Its valve-controlled design lets you steep like a French Press, but filter like a pour over—making it an ideal “beginner-friendly” brew method.
Brew characteristics: Medium body, smooth texture, and balanced flavor.
What You’ll Need:
- Clever Dripper brewer
- Glass server or mug
- #4 coffee filter
- Grinder (medium-coarse grind; like sea salt)
- 23 grams freshly roasted coffee
- 360 grams of 195-205°F hot water
- Use a 1:15.65 coffee-to-water ratio if scaling
- Spoon
- Timer
- Scale
Step-by-Step Instructions:
Step 1: Prep Clever
Insert the paper filter and rinse with hot water to eliminate paper taste and preheat. Discard rinse water.
Step 2: Add Coffee
Add 23 grams of medium-coarse ground coffee. Place the Clever Dripper on a scale and zero it.
Step 3: Begin Brewing
Start your timer and pour 360 grams of hot water evenly over the grounds. Stir gently to ensure all grounds are saturated.
Step 4: Let It Steep
Cover and steep for 2:00 minutes.
Step 5: Finish & Serve
At 2:00, give it a gentle swirl and place the Clever Dripper on your mug or carafe. The valve will open, and the coffee will begin draining. Let it drain fully (about 1 minute). Swirl and serve. Enjoy your smooth and easy Clever brew!
NextLevel Pulsar Brewing Guide
The NextLevel Pulsar is a modern “no-bypass” immersion brewer equipped with a unique adjustable flow valve and
dispersion cap, allowing you to precisely control the brewing process—from bloom through extraction. Designed in
collaboration with astrophysicist Jonathan Gagné, its versatile design supports multiple brewing techniques in one
device.
Brew characteristics: Clarity, balance, and consistency
What You’ll Need:
- NextLevel Pulsar Brewer
- Glass server or mug
- Pulsar filter
- Burr grinder (medium-coarse grind, like coarse sea salt)
- 21 grams freshly roasted coffee
- 360 grams of 195-208°F hot water
- Use a 1:17.14 coffee-to-water ratio if scaling
- Spoon
- Timer
- Scale
Step-by-Step Instructions:
Step 1: Prep Pulsar
Insert Pulsar filter into base and rinse with a small amount of water to eliminate paper taste and adhere filter to the base of the brewer. Open valve and discard rinse water. Close the valve and firmly push the brew chamber into base. Place a server or mug on your scale with the brewer on top.
Step 2: Add Water (Water goes first for this recipe)
Add 160 grams of water gently to the Pulsar to ensure it does not rip the filter.
Step 3: Add Coffee and Stir
Start your timer, add 21 grams of medium-coarse ground coffee and stir gently to ensure all the coffee is saturated.
Step 4: Let It Steep
Lid on and steep for 0:45
Step 5: First Pour
Release valve at 0:45 and pour 100 grams of water by 1 minute
Step 6: Second Pour
At 1:15, pour 100 grams of water by 1:30
Step 7: Finish & Serve
At 1:30, give Pulsar a gentle swirl as the water draws down
Coffee will drain and finish around 3 minutes, but this time will vary based on coffee and grind.
Enjoy your balanced and nuanced Pulsar brew!